If one is up to begin his violin lessons or wants to start like a professional after buying a violin, it is necessary that he sets the instrument into its best condition.
One may not feel like continuing his violin classes, or find any professional improvement unless his violin is delivering the expected tune. It can be demotivating for the one who wants to learn music. One may also be upset if he does not find the passion and confidence while playing his violin. So, do not forget to get your violin all set up before you start playing it.
How to Setting Up A New Violin
You need to make some final adjustments to the violin to make it ready to play. You need to work on some elements to set up your violin properly so that it does not become difficult for you to play it. Poorly adjusted violins are not ready to give what musicians want. So, adjust them well and use the necessary elements so that your violin gives you a beautiful melody. You may also find it easy to play the instrument once you make it very useful.

String Height
A new violin requires a nut adjustment to give the strings an accurate height from the fingerboard. The height of strings makes it harder and easier for the musician to play the violin. When strings are having greater height, it is difficult for the user to play. For a beginner, it may seem harder than that. It is necessary to file the nut slots at the correct angles. Every tiny correction made to a new violin can make the experience better.
You need to measure the string height at the nut from the fingerboard up to the strings. Make sure you have a balanced height. For beginners, it is tougher to play the violin when strings are too high. If there is no nut string slot on a new violin you need to cut the slot carefully to the right depth so that the strings stay at the right height. It is needed to consider the angle of the cut for making good quality tunes. After cutting the slots, one must check whether all strings are at a similar height or not. Hence, a feeler gauge can be useful to measure the height perfectly. The slots should be cut in a way that helps the strings to pass over the slots easily at the time of tuning.
Pegs
There are holes for the violin pegs which are tapered. The frictions hold each peg in the right position and stop it from moving or slipping, which is one of the reasons why violins lose tune. Flush pegs stick to the place and help its user to play in proper tune. It becomes a worse experience when the violin does not keep its tune. So, before playing violin, one needs to make sure the condition of the fitting of violin pegs is all good. If the pegs seem not tapered well or perfectly cylindrical, you can use a shaper. Second, you need to look at the peg box. A properly adjusted violin should have pegs passed through the other side which means the pegs are gripping perfectly. But you also need to make sure your violin pegs are free to turn. If not, you can just use a reamer to trim some wood away. It is going to help the pegs fit well. If your violin pegs are stuck, you have the option to use a peg paste.
There are some possible reasons causing the pegs to get out of the peg box. First, you need to check if the wounds of strings are correctly made. Incorrect wounds may force the pegs in the outer direction. The violin strings may also get loose because of wrong wounding.
There are different kinds of violin peg lubricants. If they are put too much on the pegs, it may cause unwanted movements. You just need to find the best one for your pegs that gives the right balance to keep the friction.
Sound Post
The sound post is a dowel inside the violin. It is one of the most important parts of the violin to set up. A sound post is needed to fit the contour of the instrument body. Fitting the sound post takes some skill. If you are a beginner, it is best to leave it to someone expert or experienced. What is necessary is having the surface connected through the sound post. Any wrong adjustment to the sound post can bring a huge change to its sound.
The sound post is cut for the ends to match violin angles. When the sound post is fit in the violin, the top and bottom angles are accurate. Any tiny shift of the post can alter the violin’s tune. You can find the position of the sound post whether it is perfectly vertical with the body or not by looking through the F hole.
Sometimes, sound post falls and requires readjustments. In this situation, you need to loosen all strings and take the tension off. Then put the sound post again to its right position. If your new violin has a completely new sound post you may need to cut it.
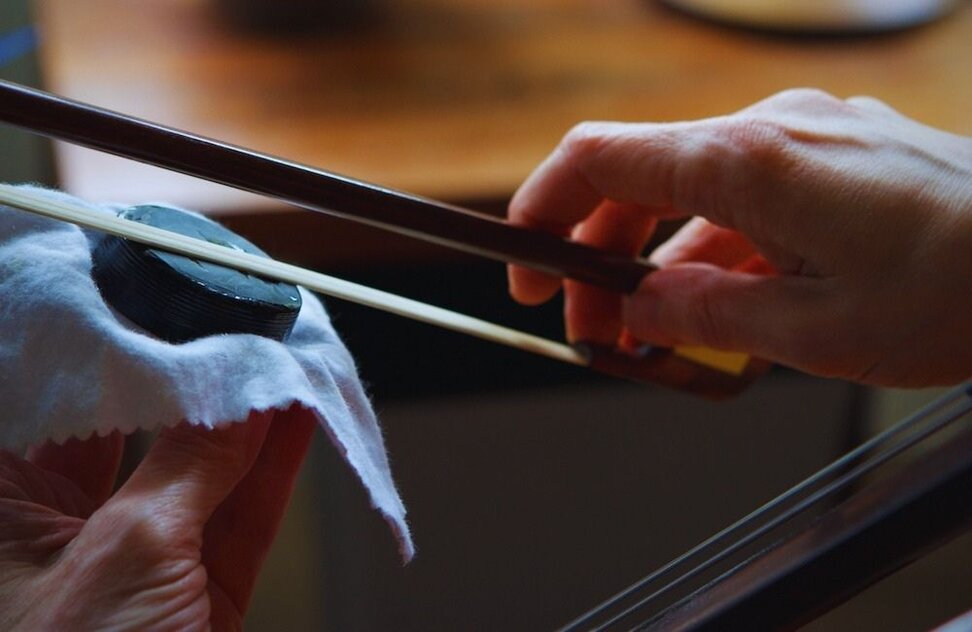
Bow
You need to set up the violin bow too. You can loosen and tighten the hair of the bow by the screw. When you have the screw in front of your face, turning it clockwise means you are tightening the hair. Do the opposite to loosen. When the bow is not in use, it holds the loosen hair. So, when you have your new violin, you may need to tighten the hair by the screw. Remember not to overdo it. The bow stick must not come into contact with the hair while playing the violin.
A new bow has no friction in its hair which means it will not make any music when you move it through the strings. One has to apply rosin to the hair of the bow. Usually, you are given a piece of rosin with the new violin. If not, you have to buy one to make the bow work. Rub it across the hair until the rosin becomes opaque a bit. Test if the bow is making the sound. Also, avoid touching the bow hair with your hand.
Bridge
Fitting the bridge correct is very important. It makes the violin easy to play. Usually, new violins have a higher bridge for compensating for other spaces of the violin. A higher bridge makes it tougher to press the strings. Bridge feet have to match the contour of the instrument appropriately. It should be matched down to the finest detail. The bridge height needs to be measured once matching is complete. The extra material has to be removed from the bridge’s top. The slots should be cut after the bridge fitting is done properly.
One can use bridge blanks to fit the bridge. It requires one to be careful to start with the bridge and fit the bridge feet to the violin contour. When the basic shape is made, one has to carefully remove the little areas. People can use carbon paper to remove those areas. This is how the bridge starts getting fit slowly. Once it has finished, it is time to check how good it has been. The bridge may look much more delicate after the effort. Do not forget to recheck your violin strings height after fitting the bridge.
If you find your violin bridge fallen, loosen the strings a little. Then bring the bridge slowly back to the place using two hands. The strings have to be placed at the center over the fingerboard. While tuning the strings, make sure the bridge is not being pulled too much. Make the bridge straight gently.
Tailpiece
One of the duties while setting up a new violin is positioning the tailpiece. The distance from the bridge to the tailpiece must be accurate. The poor condition of tailpieces can cause tuning problems.
Look at the distance from the violin nut to the bridge first. Then check the distance from the bridge to the tailpiece. Measure that correctly. Fit the tail guts to avoid any type of intonation problem.
Chin and Shoulder Rest
You may need to change your violin if it does not fit in your jaw shape. Shoulder rest is a separate tool that does not usually come with a new violin. The intention of having a shoulder rest is to fill up the gap between the musician’s shoulder and the back of the violin. Many people find it helpful to have a shoulder rest. If you feel so or your teacher tells you the benefits of having one, you can get a shoulder rest for yourself.
If you want to play the violin, bring the best out of it. Set up the one you just bought like a pro so that it can give you the best tunes. You may start feeling the passion and love for music once you have the best version of your violin.